


DDR Recovery Software - Professional Procedure |
| How to recover deleted files?
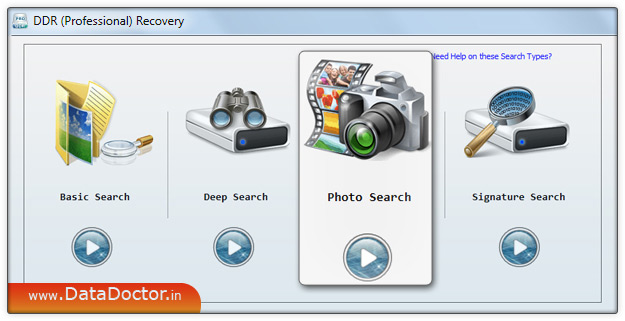
Following steps will help you to get back your all lost or deleted files and folders from hard drives. Step 1: After successfully installing DDR (Professional) Recovery when you run the software, the following screen appears:
|
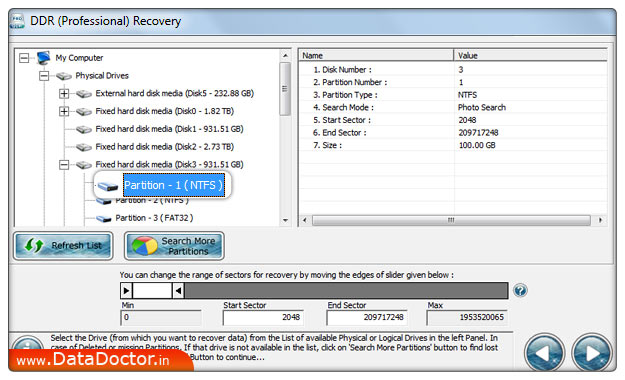
| Step 2: Select the disk from the left panel from which you want to recover data from the list of available Logical or Physical Drives in the left panel. If you want to recover data from "Physical Drives", then select Physical drives options,As shown in [This Screen] If you want to recover data from "Physical Drives", then select Physical drives. Select the "Physical Disk" from which you want to recover lost data. Click on 'Next' button to proceed. Note1: Click 'Refresh List' to see the updated status of all connected disks to your PC. Note2: If the partition from which you want to recover your details is not in the list, click 'Search More Partitions' button to search other Lost or Deleted Partitions. If your disk partition was formatted with different file system and now your disk partition is shown with another file system, then in that case you need to select the previously existing file system from the drop down list to perform the lost data recovery. |
Step 3: If you want to search lost picures in "entire storage of disk" , select the disk from which you want to recover data.If you want to search lost pictures "within a specific sector range", then drag Left and Right edges of Slider to enter sector range or you can also enter these values in ‘Start Sector’ and ‘End Sector’ fields manually as shown figure:-
|
Step 4: [This Screen] shows Search based on DDR General Recovery Procedure.You can stop searching Files and Folders by clicking on ‘Stop Search’ button. It is strongly recommended that you should allow the software to complete the searching process. [This Screen] shows Search based on DDR Thorough Recovery Procedure.Among recovered thumbnails, if you do not find the preview of Picture files that you were trying to recover, use any of the following methods to recover your data: » Please make sure that you have also enabled the ‘DDR Thorough Scanning Algorithm’ search on the software screen, where you select Searching Criteria before launching the scanning for recovery.» Please allow every process to be completed up to 100 percent. Make sure that your storage media is connected to your computer properly and you have sufficient user access privileges of your computer to run Software on it. Note: To Stop recovery click on 'Stop' Button or please wait for the process to be completed. |
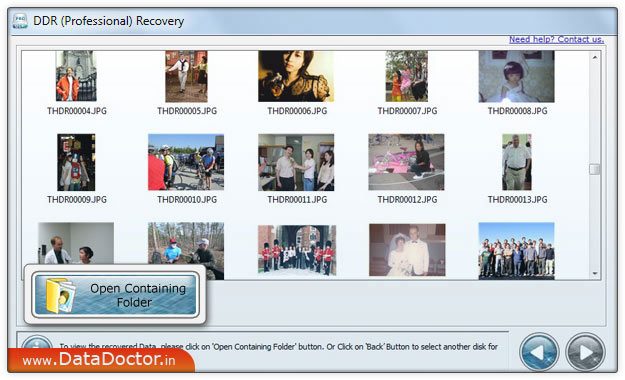
Step 5: Once completing the searching process, the recovered Picture files is displayed as shown in the following screen:
Note: You can see the preview of selected image by double-clicking on the image. |
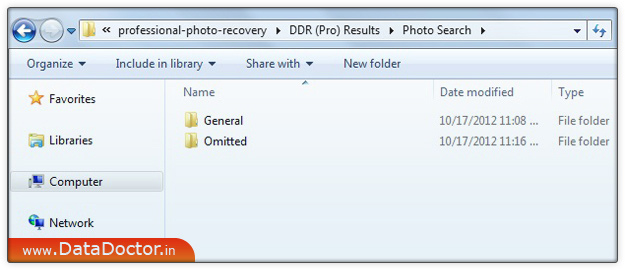
Step 6: On Clicking ‘Open Containing Folder', the following screen appears:
Click on ‘Omitted’ folder to view the omitted recovered Picture files (using DDR Thorough Scanning Algorithm). |
Click Here for Other Software |


![[This Screen]](images/professional-002.jpg)
![[This Screen]](images/professional-004.jpg)
![[This Screen]](images/professional-005.jpg)